Tag: physio
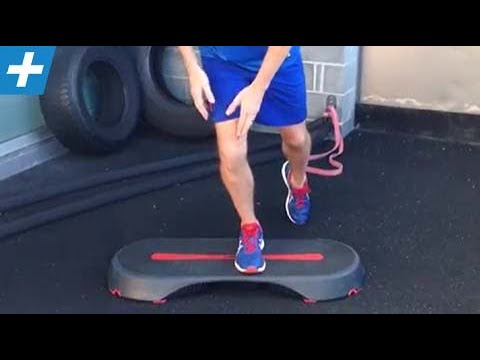
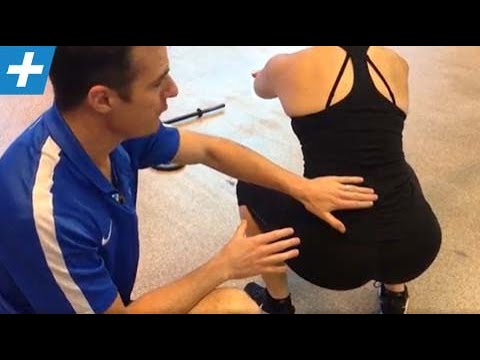
Step Down Pt.2 – for knee rehab and glute strength | Feat. Tim Keeley | No.69 | Physio REHAB
admin123 0 Comments Back Pain CHRONIC PAIN
All title today we 39, re doing the step down part two now this. Is taking into account all the stages from regression right through to stepping down the BOSU and it’s, one of my favorites for knee rehab, good rehab knee ache, so let’s start off with a few cases fundamentals with the steps down. Remember it’s like a one legged hunker, but what we’re trying to do is control the e centric phase of steps down off the box, but not putting weight through the back leg. So we’re going to keep heavines on the breast leg and then stepping back up now, when you start off this exercise, some people that have knee agony or they’re just out of surgery or they’ve, got a little bit of weakness through The VMO a lot of weakness through the glutes, so we have to try and change the practice to accommodate that first things. First, what you’re going to make sure of whenever you’re doing the steps down, is your knee? The middle of your knee needs to the other, the middle of your foot. Now the midriff of your foot is between your second and third toe so that’s on the outside your big-hearted toe. So the best thing to think about is when you’re doing a steps down, think about the knee on the outside of your big-hearted toe. Alright, so you should always be able to see your big-hearted toe now. The other thing so that’s that’s hinder that in line and that’ll teach you not to go your nin, because if your knees rolling in you ,’ ll see it cross over your large-scale toe. So you always got to try and keep it out, and sometimes it goes in as a matter of. Is it my lateral rotators that a week here, as are my glutes, that a few weeks here, it’s not definitely a week VMO that moves it in that’s usually up the top now and the trendy okay, so knee adjustment is important. The hip alignment is really important as well. So when you start off you ,’ ve got to have your trendies, as in the ASIS on either side the level of the pelvis it’s got to be level. At least I’d. Preferably, it be a little bit higher on the opposite side, then you really know that you’re using your glute on this side. Your glue, meat and men. Now there you’re walking muscles. So you imagine I’m walking I’m going upstairs or I’m running that statu there. I need these muscles to keep my hip high-pitched, so I are truly clear my leg through the anchor that’s why we’ve got them all right. So when I’m walking, if I don’t know place my sky, I’ll scuff my paw, so it’s a good way to think about. Can I preserve my pelvis high to clear my leg through the soil and this position needs to be held the entire term when I’m going through that steps down that reverse doodly-squat? So if I was down here and I sag you’ll appreciate, my leg comes in a little bit. So if you’re using a mirror in front of you, you should ever see your legs parallel and not slam in that way. Let that leg droop, because you then, if that happens, you know your leg is descent. Your pelvis was putting down. So what I mean is, if I’m here, you don’t want to be throw. That nature. When I go into a diddly-squat – and you see this a lot when people doing strengthened in or step downs winding it squats, they’re flatten their pelvis. Now, if you stop your pelvis okay, you’re not doing any is currently working on your glute and then the femur is going to internally rotate what it’s going to drop into valgus, which is going to give you their knee agony, which is what we’Re trying to avoid in the first place so very important that you save that pelvis stage all right throughout the entire movement. Now one thing that can realize you quit your pelvis is, if “youre trying” reach for the field, okay, because some people run out of range in the trendy, so they’ll squatting down, they’ll run out of range now and then they’ll. Just drop alright, so you’re going to make sure that you actually bend at the hip to do the movement and sometimes they can do it because they’ve got frailties. So let’s is the beginning with the first step. We, like the regression grade and this two things. The regression of a1 is a toe tap step down, and one is a regression step down now. The toe tap step down is going into a position where you’re, actually sitting back, but you’re , not letting your knees come forward. Okay. So if you look at, if you come in here when you have a look at us, so when I stand on one leg, when I sit down to the position, be seen to what extent my knee remains relatively, where it is, I’m not letting my knee come forward. Like a ordinary steps down, I’m just prevent it there and sitting backwards now from there. I’ve got to try and are of the view that static situate. Okay, tap my paw on the back, tap it on the front and the heel tap it on the back. So I’m not actually moving on my heavines bearing leg. I’m trying to hold this isometric contraction of my knee my quad here my hammy, my glute saving my pelvis statu and merely gotta go back and forward it’s actually quite hard. Quite taxing for that load standing feature, okay, so that’s. The first thing you do so you shouldn’t get any knee pain with that because you’re not moving in need all right and your practise, your VMO, to get a bit of static control, your training, a lot of glute static dominance, and that structures That basi for you to be able to go okay, I can get down it and I can laden and wait bear so the second level will level 1 duty. Two is the regression where you go to the same position, but you move into the position and then you move away okay, so you steps down, but I’m not allow that knee come forward. So I’m moving more of the trendies of doing more glute succeed that I am knee work now. Of direction, your glutes are going to get stronger than your knee at this degree, but you have to because if you’ve got knee aching, you’re. Currently, there knee go forward, so it’s better designed to strengthen the trendy, do that stronger white-hot and give the knee gradually stronger and while there are encompass and gets better, then you can move into stage two which is going from the step down regression like That to actually letting that knee be forwarded, so I’m in more of a regular hunker predicament. So if you imagine like, if I was in a squatting okay, I’m doing the same thing, but I’m just doing it on one leg: alright, and you can call it a one legged hunker if you like, but we call it a step down Because that’s, the free movement of persons where develop is their ease, injure ensure and then coming back up, so we’re not actually stepping up okay, we’re stepping down and then returning , no and just letting that knee come forward. Now you can choose how much your net knee comes for you can. If you’ve got a little bit of aching later coming for Livermore, so you sit below the ache and as you get better and that improves you can get that knee going forward and forward and forward and tell us the right inclination, just like you would Do in a squat all right now, you’re level. Three, all you need to work on is putting some sort of resistance to the movement of the knee. I don’t mean lading the body there -‘s no spot putting weights on until you ,’ ve worked on the lateral component of it. So getting a stripe like this and putting it around got God to see the breast knee, but it’s the outside of your knee okay. So at the outside of your knee and you’re going to stand on that leg and then try and balance and again I’ve got to try and continue my knee on the outside of my toe all right and then the band is trying to Pull me in, I’m trying to find it, so I needed that will stir you work hard now and these new challenges me laterally. So when I go in to step down okay, I’m trying to resist the band, and that gives me more manipulate right up here. More limit, duty that I need to do is that’s about the control of the knee. Now that I’ve got the backbone up to handle the squad datum, he’s got the strength up before and now I’m going to work on my power with a better resist laden, all right and then you’ll, verify on rank four. We go to a BOSU, I mean you can use the wobble committee or a BOSU doesn’t really matter, and this is really working on a lot of motor control now, so we build our forte and a little of control there, and then we sharpens precisely On power at the end stage right because you know you can do all the squats you like to get the strength up higher and higher, but you still got to work on control for the best rehab and your knee so offset on there and the same thing Knee on the outside of your toe stepping down tapping the floor coming back up and notice, I’m not put heavines through my back leg. I’m keeping the weight on the BOSU and I’m trying to keep it level. Doesn’t matter. If it moves a little bit as long as my knee remains quite stable, doesn’t roll in okay and same with my trendy again, keeping that hip nice and position , not making it dip down and coming back up and that’s it
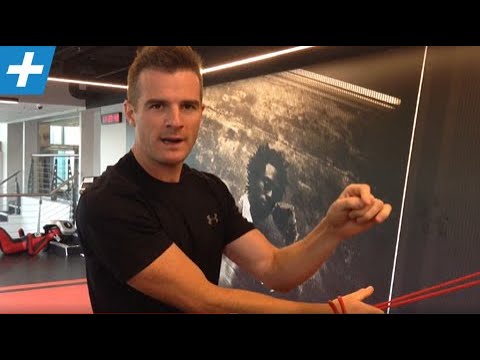
Reduce neck and shoulder pain in a one arm row / pull | Feat. Tim Keeley | No.23 | Physio REHAB
admin123 0 Comments Back Pain CHRONIC PAIN
okay today and we are looking at trying to get you working on the correct row post for your shoulder blade or your scapula so a lot of parties are having troubles when they row or when they do an forearm draw they’re doing the wrong things with their slipshod auto-mechanics and that can be due to pain to be witness to the four practices bad muscle govern today we’re going to try and support you how to use exerts to try to improve their control what their power needs to be like so a lot of time beings have sorenes down now the old-fashioned cervix ache from from computers or their training too hard and we accompany a lot of people with pain into the rhomboids and into that levator SCAP meet your sketch and what it tends to do is it tends to muck up their shoulder move and they tend to pull incorrectly and they tend to push incorrectly now this episode is about the pulling movement clearly we’re doing we get beings doing a lot of serratus movement and press fluctuation but we’re talking about the pull advance so with plucking what we want to focus on this with the sequence is Magnus sure you’re doing getting your shoulder blade plucking back correctly been using it rhomboids you’re using lats but uttering sure you access the lower bunkers to keep the shoulders stable most of time people attract and they pluck and they hoist and they use their upper trap to try and compensate because they’re massive baits aren’t working or “theyre using” this cire their levator SCAP to pull upwards and they can plead to a lot of difficulties when you rogue with a lot of neck pain and a lot of shoulder pain especially in the figurehead of the shoulder so first things firstly we’re going to try and I’ll testify you what the chastise action is for the shoulder route when you attract and then we’ll show you some practices so if you imagine what you’re trying to do when you draw when you move back with your shoulder bone has to come back first okay so shoulder bay comes back and as I pull back I’m exploiting the long committees but I’m trying to getting my fright catch activated so my shoulder baits sitting down I gathered it right back and then I’m going to pull through with my appendage preparing sure though when you pull through what you’ve all had to do is then rotate because I’m letting got to go so I’ve got to pull back hold it back squeeze out there pull round and then when I return it’s just a reverse flow so return the appendage to a dupe most movement and then get the shot of protech for okay so if we can start off on usage and now he only grab a pole could be a door jamb can you think what I require you working on is starting and then stay moving out you can go high-pitched and which axis in the bottom I’ll check that same crusade so you pull back it’s a style of shift so this is scapular rows consuming a saloon and you notice this is a closed chain position so it accesses a lot more stabilizers then then doing an open chain so that the closed chain position so I’m doing a scapular sequence so I’m just pulling my shoulder craft back and there’s my shot of a drags back I’m putting my torso forward right made to ensure that I don’t go on elevate and access my upper bunker to do a bit operate I’ve gotten try prevent my my distance between my ear and my shoulder quite little okay so drawing back pinching back and then not just dropping I’ve got a gradually release that a shorter way forward so that’s just scapular right okay with the bar really good want to start and then you can start doing with a band so this is more of an open bond exert so I’m now working on trying to do the same movement but restraining my person still so if this movement now I’m going from there and it’s just the shoulder bag that’s a very vulnerable exercise pretty easy what you’ve got to try it’s teaching you though to do scapular push precisely when you travel okay most the time you’re used to pulling so when you pull back you don’t want to start beating your shoulder so try and forestalled that so you by the right bank that I tell about it and then release forward again okay so scapula back and then forward again now to join combine that together you want to do a one-arm right and we can only use a exhibition bet if you’re a big week you’ve got a bit of pain I simply show go down to one but I’m expend 2 day so when you pull through now so we’re going to use the idea of make kept in a row so it’s row back then feeds your appendage for now as I come through I’m still pulling back I’m not countenance it go okay so I still want to get that last few kind of 1020 the Greens have didn’t have the traction back and offsetting sure I’ve got a decent distance between now and my shoulder so I’m not elevating I’m exerting my lower check and Matt’s gonna out your back here so stop that core on now when I’m back here I’ve got to try and stop my shoulder room back as I return the arms and don’t pop the shoulder move forward now keep your shot of a back as I return the forearm and then there’s a shot of a project quarter so that’s the movement that you guys need to be doing whenever you do any gathering with rowing pitch-black pull down stats I think it’s manufacturing sure you bounce the road pull through return return and I like to do this something finger on the back so thumb on the back of that shoulder bait so I can feel when my shoulder like this my finger pull through now obstruct my shuttle bay on my thumb and don’t mean it pull away my paw it’s a really nice little tube you can get that sort of shorter boat on your finger so as it comes back strokes your finger push your arm through and then keep it there until you need to release and let it go so this is one R one and row and then we can go okay what about pull down so if we go to something higher appended imagine like you’re doing a one-armed pull down like on a cable machine or we’re doing lat pull-downs this is going to help you perfect that move through your shoulder so when you do pull down when the load gets any when it starts get heavy you don’t go and do this because we find it when people do lat pull-downs the heavier the consignment when they pull down they start you read those shoulder blades rising up so we’ve got to get you going draw those shoulders down and then pulling through and to be maintained down and then as you return you’ve got to keep them down for the first part of it and then construct the rest far too many people make them release very immediate okay so this is where you have to go back higher and again one arm at a time because you can access one forearm at a time that’s way better to learn so if we came from here you down it now if you want to go lower down into one me shoulder back down pull right through better here’s the quirk impede that shot away back exploiting those mower racetracks down the back here and then release forward okay recur pull down pull through hold it down there and secrete sport and this is great for determining what with all those problems but beings are going sorenes anteriorly in the shoulder when they pull through that missile rollings for intensive want to roll out the seam when they pull through and they’re getting ache in the front so sick that a little more properly and likewise facilitates with parties going anguish in the back here where they’re overusing rhomboids overusing upper traps overusing levator SCAP and not accessing those lower trad muscles so start working on that likewise check out our lower trap exercisings that we have on on the videos and our serratus interior for the pressing work

How to Squat Safely and Correctly with a Back Injury | Feat. Tim Keeley | No.71 | Physio REHAB
admin123 0 Comments Back Pain CHRONIC PAIN
all right we’re here today with Nicky and we’re demonstrate you how to do a squat properly and safely when you’ve got a dispersion and how to prevent any disc injury so with Nikki she’s got a current put and when she squats we’ve got to make sure she doesn’t get below what we call a break point so Nick if you precisely show us like a squat for me and we’ll just go side on what we want to make sure if she doesn’t do that but went connection form thing and so a lot of people this sort of degree will be 90 units so she goes need lower than that can you see that what happened there so if you come and I can have a look at this she goes from at this is she’s also a little very widened at this extent as well which we’re going to fix as well but when she descent lower did you see how that opens up there now what she’s doing she’s not even actually at 90 degrees hitherto down now they’re now at that point she’s actually rounded in now which is bad for her disc prominence so come on back up again because then she goes into extension which kind of gleams the as there and she comes up again so for this one for her safety-wise and for anyone who’s got a disc bulge and wants to prevent any back ache as you can go below the target where you’re going to lose neutral prickle so at that point there she can’t make that low-toned now for some people they’ll be able to go lower than that they’ll be able to go right to 90 severities because they’ve got accumulations of range in the trendy they’ve got a really good core stability here they don’t lose any neutral backbone but for her she needs to be very aware and look in the mirror about her position so you see that neck so if you come down again for me – she needs to go – woo come back up and she need to get used to where that situation is okay because if she goes in lower she goes into flexion she’ll then posterior projection that saucer and then reinjure herself so she’s got to work on that the other thing she’s got to work on is she charities being hyper diversified here all right so this position here needs to actually become a bit of neutral now I don’t mean go into flexion I make she exactly needs to stay in neutral so she’s got to really hold the line interior with her core there and when she hunker she’s got to keep it on she wants to just till she wants to incline this pelvis like that to kind of squat because she wants to behold her sticker increase instead of go into flexion but that becomes really bad when she gets down the bottom so she’s got to learn can I regard neutral in the backbone and deflect at the hips so the hips have to go down and back so try that for me neck there you go that’s better and then she stops Laura Laura like she still has to watch her burst top she stops her neutral backbone just so much harder right and then come back up with hip postponement so when she comes back up she doesn’t have to then tuck a slacker under it’s actually in neutral so the gimmick is start a neutral and go very slowly down expand the trendies backwards and down into that position that she maintains initial don’t go below that breakpoint and glance the butt and then when she comes back up he’s got an alia to extend and then she comes back neutral and that’s it hard to practice and she’s just make the body weight of mine because it’s if you try and introduced stockpiles of heavines on there she’s going to one go into an age-old structure but she’s also just going to load the prickle which we don’t want okay so for her it’s going to be really hard for her to try and try that again with a table it’s going to try it it’s going to be hard for her to do a back squat in that position because if occur in the shift if she tries to a back squat what happens is you tend to extend through your backbone up that so she’s going to find it relatively hard to keep a neutral when she goes down so you try that for me yes just kind of find it see that did you see that so she went straight into extension that point there come back up again so I don’t really like this for knee hurting so you wouldn’t elevate someone’s ends if you had patellofemoral suffering you wouldn’t do that but for her what we can do as long as those feet are apart she prevents her knees apart we can elevate her heels to help her with her spinal slot when she hunker with the intention that you’re going to take these sheets away at some object okay peculiarly if she has knee pain we’re not going to use them but now try that for me and you’ll find that she is able to maintain a better form there’s that but Winkie so again let’s try that again this is where hands-on helps a little bit so neutral she sits down and back comprised hold chase and then come back up and I’m just pas it with my hands is an attempt restrain her a neutral earn her be into the trendies the most try again for me attend didn’t do that by yourself and she’s a little bit too upright do you see that so we’ve got to try and get her directions of her upper figure the same as shin okay so try that again for me forward North upper body that’s a bit better we’re getting there chase and then come back up and bummin yeah okay so this is how we learn to try and get a better and better squat what I would do with her though to meet things even better as you were doing a front hunker so front hunker the refuge the bar so we better to rub her you start off with a kettlebell there you go now that’s ten kilos with her times difficulty one-tenth time who does trouble ten kilos is okay I probably wouldn’t go to twenty this stage just straighten your paw up for me in here that’s it alright so from here because the way from the front she can then concentrate on what’s going on with their sticker here so try that again so reciprocal backbone sit back hold push back up I’m forward so make sure you don’t fold the projectile under that’s missile forward so you extend the hip go again fine good and come back up and again she’s maintaining still a quite an upright spine we’ll get that angle forward a little bit better as we go but that’s looking really good now tips for her is to so she can see what she’s doing she needs to then vanish line-up onto the mirror and realize her own sticker and make sure that’s all correct but that’s great okay okay we’ve practised a little bit so show us again when you no need to do and she’s using now the mirror slope on and what she’s going as method better proficiency now which he watches it and now she’s got that excellent slant of back and shin together she’s got a knees wide okay she’s got a feet latitude knees wide she doesn’t want to be like this okay go again and she’s worked out how to not but gleam and continue a neutral spine not be too upright keep it forward a bit but likewise she’s worked out how to not extend here she’s worked out how to extend at the hips and keep the spine in neutral so she’s before she was sort of sitting her bum outwards now she’s holding here and now she’s worked out that you can bend here and being now squat down to fall in and those the two points of fulcrum and then this will naturally come down and you’ve got that perfect I live in there and yes we’re up on a sheet as you carp again and when she’s looking left it’s really hard to hold a load so you practice with a reflect with no weight so you’re not sort of wrecking your cervix with a heavines and then as you get the form right then you can add the value as you get better score stability better awareness of hip pinch now take the plates away